Important Note: Do not begin this process unless you have already been accepted to the UC Davis Washington Program. Students who begin this process without prior acceptance will have their participation status marked as "denied."
Please follow ALL the steps below to sign your UCDC housing contract, which is due by the deadline listed on your Washington Program acceptance email for the quarter for which you were accepted. You will need to start the process as soon as possible to get all the information into the system, send a notification email, get account approval, and, finally, sign the housing contract.
Please be aware that some UC campuses use this system as an application for their version of the UCDC Program, therefore, there may be references within the system to this being your application for the Program. If you have received an acceptance email from the UC Davis Washington Program, you will not be re-evaluated, however, this system is required in order for you to sign your housing contract.
Please begin the process below. If you get stuck, re-review the instructions for the section in question. If you are still unable to move forward, email [email protected] for assistance.
STEP ONE: Sign up for your my.ucdc.edu account
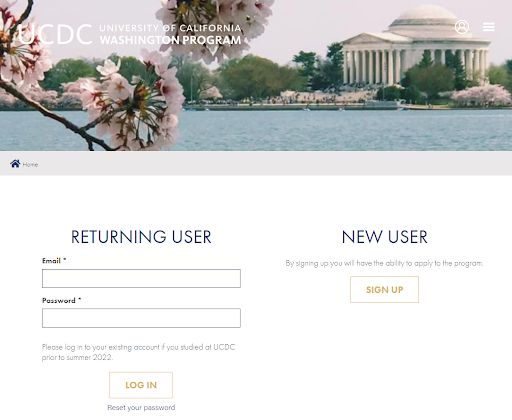
- Go to the UCDC student information site at: my.ucdc.edu and click the "New User" Sign Up button as shown below:
- Within the sign up screen, you will be asked to fill in logistical information. If any fields are completed incorrectly, your user account will NOT be accepted. If a mandatory field does not apply to you, please enter "N/A" or "Not Applicable" into the field.
- Make sure you enter your UC Davis email in all fields where you are asked your email address.
- Make sure you choose the UC Davis campus under the section marked: University Campus.
- After completing all fields and verifying that you are not a robot, click "Create new account."
- You will be brought to a screen that says, "A welcome message with further instructions has been sent to your email address. PLEASE NOTE: if you do not receive a confirmation email in your inbox, please check for it in your spam/junk mail folder."
- Proceed to step two.
STEP TWO: Create Password & Enter Logistical Information
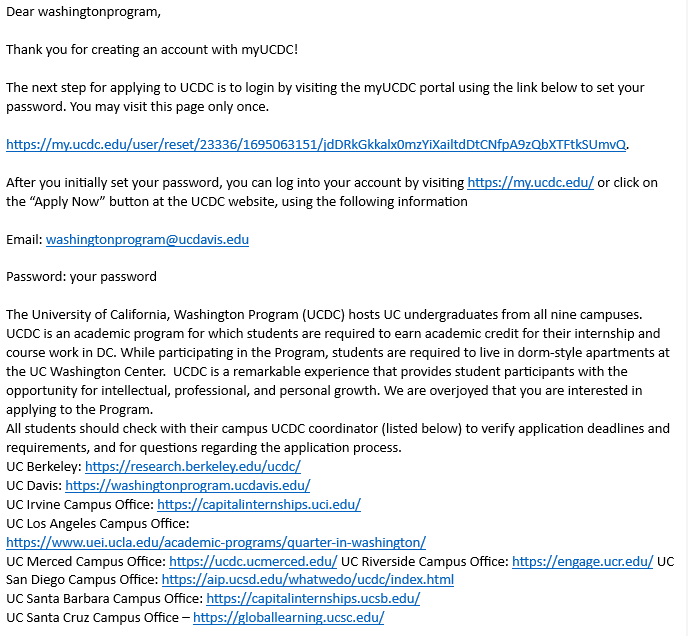
- After creating your account, a validation email will be sent to your email address. In order to gain full access to the site, you will need to follow the instructions in that message to create a password. If you do not receive an email within 10-15 minutes, check your junk email folder.
- In the email, you will be directed to a validation web page specifically for your account. See the below example email you will be sent after creating your account:
- After following the link provided in your email, you will be brought to the my.ucdc.edu page. Click the "Log In" button. Select a new password. Your password must be at least 8 characters long, contain 1 special character, contain 1 numeric character, and contain 1 lowercase character.
- After entering your password twice, click the "Save" button.
- Click the "Student" tab.
- Click "Save" at the bottom of the page.
- Log out by clicking the person icon in the upper right-hand portion of the screen and clicking log out. See the below screenshot indicating where you will need to click to log out:

- Log back in as a returning user by entering your email and password.
- Click the "Start Application" button.
- IMPORTANT!!! Select the QUARTER and YEAR for which you received acceptance. Make sure you select the quarter term and NOT the semester term. PLEASE DOUBLE CHECK YOU ARE SELECTING THE CORRECT TERM IN THIS SECTION.
*****If you select a quarter or year for which you have not been accepted, your account will be denied.*****
- Click the checkbox indicating that you are a student of UC Davis, that you are in good academic standing, and that you meet the eligibility requirements of the program to the best of your knowledge.
- Click the "Next" button.
- Complete all fields that pertain to you.
- Click the "Next" button.
- Complete all required fields pertaining to your living address and emergency contact's information.
- Click the "Next" button.
- Complete all required fields pertaining to your academic history and information.
- Click the "Next" button.
- On the following page, you will have the opportunity to upload documents. You are not required to upload any documents at this time. Click the "Next" button.
- If you have missed any fields within the form, it will be indicated on this page. If you have correctly completed all fields, continue by completing the FERPA and Media Usage agreements.
- Read and sign the Participation agreement.
- Click the "Submit Application" button.
STEP THREE: Send Account Completion Email (DO NOT SKIP THIS STEP)
Email the UC Davis Washington Program at [email protected] the following message so that Program staff will know they need to approve your account (the system does not automatically notify them):
Washington Program Staff,
I have completed the initial steps of the housing contract process.
Thank you,
[Your Name]
- After sending the above email, you must wait for UC Davis Washington Program and UCDC staff to approve your account before you may move forward with your housing contract. Keep in mind that work emails are NOT checked during weekends or holidays and it may take up to 2 business days for your account to be approved.
STEP FOUR: Sign Your Housing Contract
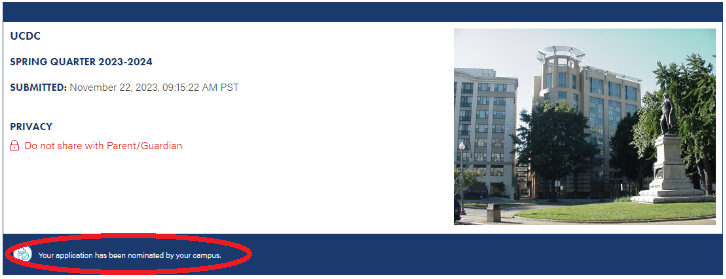
Once your account has been approved, you may move on to this step of the process. You will know that your account has been approved if, when you log in, you see the below image along with a written statement (circled in the screenshot below) that states EITHER "Congratulations! Your application has been accepted!" or "Your application has been nominated by your campus."
If your student record has not been updated within 24 hours, please email the Washington Program at [email protected].
- Go to the next page by clicking the text located in the circled location shown in the screenshot above that says either "Your application has been nominated by your campus" or "Congratulations! Your application has been accepted".
- On the left-hand side of the screen, under the "Prearrival" dropdown, you will see a variety of options. Click "Housing Contract" if you are ready to view and sign your housing contract.
- Make sure you read and understand the terms of your housing contract found on the Housing Contract page prior to signing. When you are ready, sign your housing contract electronically and click the "Save" button.
- After signing your housing contract, please review the program calendar for your cohort and make sure you have a plan in place to meet all deadlines and meetings.